Advanced Dialplans
FusionPBX installs several default dialplans. FusionPBX also gives the option to make new dialplans. This gives you the power for more advanced functions, and produce the desired result.
Adding a Dialplan
You can create a new dialplan or copy and modify an existing dialplan.
Go to Dialplan > Dialplan Manager
Click the ADD button at the top right.

Complete required fields and click save.

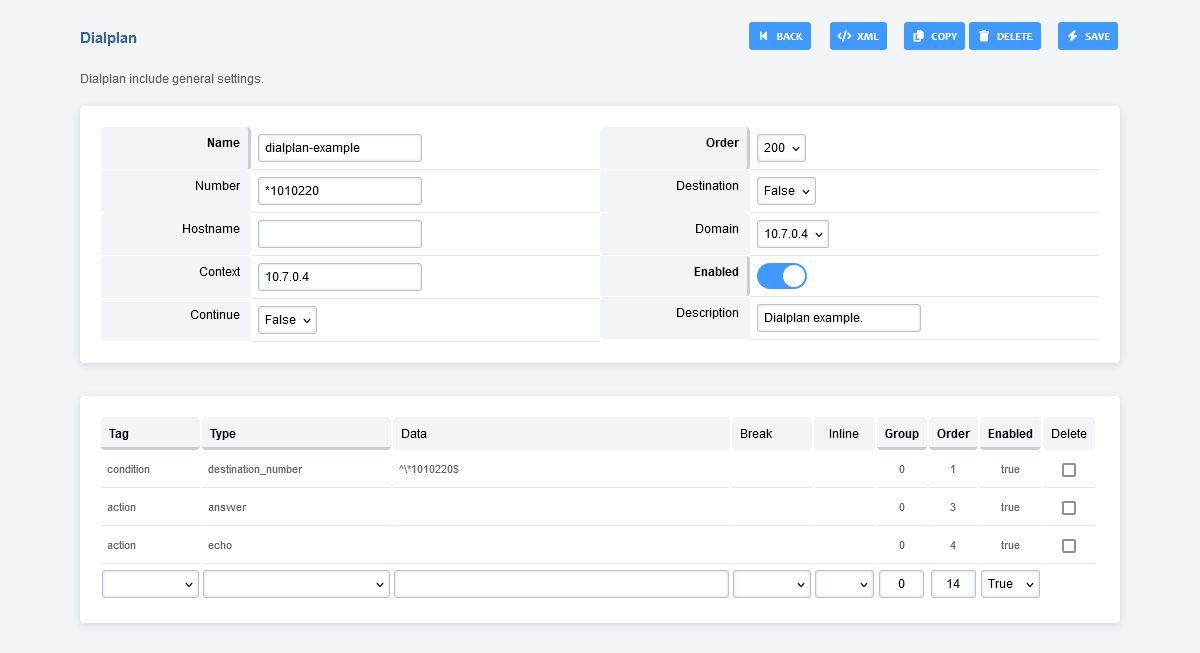
Edit a Dialplan
Find the dialplan you want to edit and click the edit icon.

Once you enter data into the empty fields at the bottom and click save, more blank fileds will populate if needed.
Enable a Dialplan Destination
Dialplans that have a value in the Number filed can be enabled and used in Dialplan > Destinations. Setting the destination field to True will enable the dialplan to be visable and used as an action in Dialplan > Destinations.

Cross Tenant Calling
This would require a prefix of 5 followed by 4 digit extensions. The prefix can be any number that you choose to use and the 4 digit extension must match the destination tenant. So if the destination extensions are 3 digit then you would use 3 instead of 4.
Tag |
Type |
Data |
Dialplan Detail Break |
Break |
Inline |
Group |
Order |
|---|---|---|---|---|---|---|---|
condition |
${destination_number} |
^5(\d{4})$ |
5 |
||||
action |
set |
domain_name=customer.domain.tld |
True |
10 |
|||
action |
set |
domain_uuid=correct-uuid-for-the-domain |
True |
15 |
|||
action |
transfer |
1XML {domain_name} |
20 |
Be sure to set the Continue dropdown box True
Finally we have the desired dialplan to call from tenant A to tenant B.

Note:
A quick way to find a domains uuid is by going to Advanced > Domains.
Then click the edit icon on the domain you want to know the uuid of. The
uuid will be at the end of the url.